

Somewhere around the 6,000th step of your day, the inside of your foot starts talking to you. Not pain exactly. More like a dull reminder that you’ve been standing on something flat for eleven hours. You take off your shoes at home and the ache sits there while you make tea.
That’s usually the point where people start searching for walking shoes with arch support. And that’s where the shopping gets confusing, because half the shoes labelled that way have a soft foam insole and nothing else behind it.
What follows is the version I’d give a friend: what support physically is, how to test whether you need it, and which parts of the shoe actually do the work. You can check most of it before you spend anything, and the checks that matter take about five minutes in a shop.
One thing to sort out first. Your foot is not a design flaw that needs correcting. It’s a structure that carries load, and the job of a shoe is to let it do that without asking the arch to work overtime. Everything below follows from that idea.
What arch support actually is, once you strip the label off
A shoe supports your arch in four places, and they’re not equally important.
The insole is the liner you can pull out. On most walking shoes it’s 3mm to 6mm of foam with a slight rise under the midfoot. It helps with comfort. It is not structural. If a shop tells you a shoe has “contoured arch support” and the only thing contouring is a removable liner, you’re buying a soft footbed.
Under that sits the midsole, the layer between the liner and the outsole. This is where real support lives. On a supportive shoe you’ll find a denser section of foam under the inner edge of the foot, sometimes called a medial post. Press it with your thumb and compare it to the outer edge. If the inner side feels firmer, that’s the posting doing its job.
Inside the midsole there’s usually a stiff plate called the shank, often nylon or fibreglass. It stops the shoe folding in the middle when you push off. Bend the shoe: it should flex near the toes and resist under the arch.
At the back, the heel counter is the stiff cup that holds the heel. A firm one keeps your heel upright, which stops your arch collapsing inward every time you land. Squeeze it. If it folds like a sock, the pair won’t hold you for eight hours.
Notice that three of those four are invisible in the product photo. That’s why the label is unreliable and your thumbs are not. It’s also why trying a shoe on beats reading about it, every single time.
Two of the four can be fixed after you buy. The insole is swappable, and sometimes the whole problem is a 3mm liner over a hard board. The other two can’t. If the midsole is uniformly soft and the heel counter is floppy, no aftermarket insert will turn that shoe into a supportive one. Buy accordingly.
The 30-second test you can do tonight
Wet the sole of your foot and stand on a piece of paper, a brown envelope, or a bit of cardboard on the floor. Step off and look at the print.
There’s a decent chance your footprint will tell you more about your arch than any shop assistant, and the shape sorts into three rough groups:
- Most of the foot shows. A wide band where the arch should be. That’s a low arch, and you’re the person who benefits most from posting.
- A thin strip or nothing on the inside. A high arch. You need cushioning under the ball and heel, and too much posting will make you roll outward.
- A band about half the width of the ball of your foot. Neutral. Most shoes will work. Buy for fit and comfort, not for a feature.
Do the test after you’ve been on your feet for an hour rather than first thing in the morning. Feet flatten as the day goes on, and the evening print is the honest one. Mine changes enough between 8am and 6pm that I stopped testing in the morning.
Then try the single-leg test in front of a mirror. Stand on one foot with your knee slightly bent. If your ankle rolls inward and the inner arch drops toward the floor, that’s a sign you overpronate. Do it barefoot, then again in your current walking shoes. If the shoe fixes most of it, your old pair was doing more than you thought.
The third check is a two-minute walk on a hard floor in bare feet, then the same walk in your usual shoes. Note where the ache shows up first. If it moves from your arch to your knee when you put shoes on, the shoe is changing how you walk, and that’s worth knowing before you buy another pair of the same thing.
Where the support should sit, and where it shouldn’t
The common mistake is buying support at the wrong height. A big foam lump under the middle of your arch feels impressive in the shop and becomes a bruise by day three.
Support needs to sit just behind the ball of your foot and along the inner edge, under the bony part of the arch, not in the soft tissue. If you press your thumb into an insole and it sinks 10mm before it stops, it’s cushioning, not support.
Heel drop matters too. Most walking shoes run 8mm to 12mm of drop from heel to toe. A lower drop, say 4mm, loads your calf and arch more. If you’re coming from years of 12mm shoes, jumping straight to 4mm is a bit of a gamble for your Achilles, especially if you’re over 40 and walk 10,000 steps a day.
The other thing to check is the lasting board, the flat layer under the insole. If it’s stiff card and you can feel it through the liner when you press, that’s what will be pressing into your arch at hour six. Softer lasting boards feel better immediately and pack down sooner.
Here’s a shortcut. Take the insole out and look at the space underneath. If the shoe’s floor is flat and hard, all your support has to come from the insole, and insoles compress. If the floor has a moulded rise under the midfoot, the shoe itself is doing work. That’s the pair to try on first.
One quiet detail worth noticing: the width of the heel. A narrow heel cup in a roomy shoe lets your foot slide sideways, and sideways movement at the heel translates into arch strain up front. If the heel slips even a little, size down or pick a different last.
And if you’re replacing an orthotic with a shop-bought insole, go up half a size in the shoe. A 3mm insert plus a thicker sock is enough to take up the room, and a shoe that was snug without the insert becomes tight with it.
High arches need the opposite of what you’d guess
If the wet test showed almost no inner band, don’t buy the firmest shoe in the shop. High arches are usually stiff arches. They don’t collapse, they don’t absorb shock well, and they transfer impact up into the shin.
What helps is cushioning, flexibility, and a wide enough toe box that your toes can spread on push-off. A rigid posted shoe will hold your foot in a position it doesn’t want, and you’ll feel it on the outside of your ankle rather than the inside.
This is where a lot of people get sold the wrong thing, because “arch support” reads as “more structure is better”. For a high arch, more structure can be actively unhelpful. You want a 6mm to 8mm removable insole with soft heel cushioning, and a shoe you can twist slightly in your hands.
Same logic for very flat feet, oddly enough, but in reverse. Very flat, flexible feet often do best with a firm heel counter and moderate posting rather than a maximum-support brick. The brick stops the collapse but also stops your foot from doing any work of its own, and your calf gets lazy. Then the first day you wear something else, everything hurts.
If you have one flat foot and one neutral foot, which is more common than people admit, buy for the flat side and add an insole to the other shoe if it feels loose. Matching the shoe to the worse foot is the safer default.
High arches also tend to come with a narrow forefoot and a bony instep, so lacing matters more than usual. Skip the top eyelet pair and the shoe stops pressing on the top of your foot. It’s a free fix that most people never try, and it changes a pair from painful to fine.
Eight hours on a hard floor: what fails first
Concrete is the test that finds every weakness. Tile and concrete don’t return energy, so your shoe has to.
The order of failure is fairly predictable. Hour three, the ball of your foot feels hot. Hour five, the inner arch aches. Hour seven, your lower back joins in. By the time you get home, the shoes feel a half size too small because your feet have spread.
If that sequence sounds familiar, check the shoes in this order: heel counter firmness, then shank stiffness, then whether the insole is removable. Those three cover most of the problem. A pair with a firm heel and a stiff shank will get you through a shift even if the insole is ordinary, because you can drop in a better one.
What won’t save you: a thick soft midsole. It feels like a cloud for twenty minutes and then your arch starts hunting for something to lean on. Soft plus unsupportive is the worst combination for a standing shift, and it’s the most common thing sold as a walking shoe.
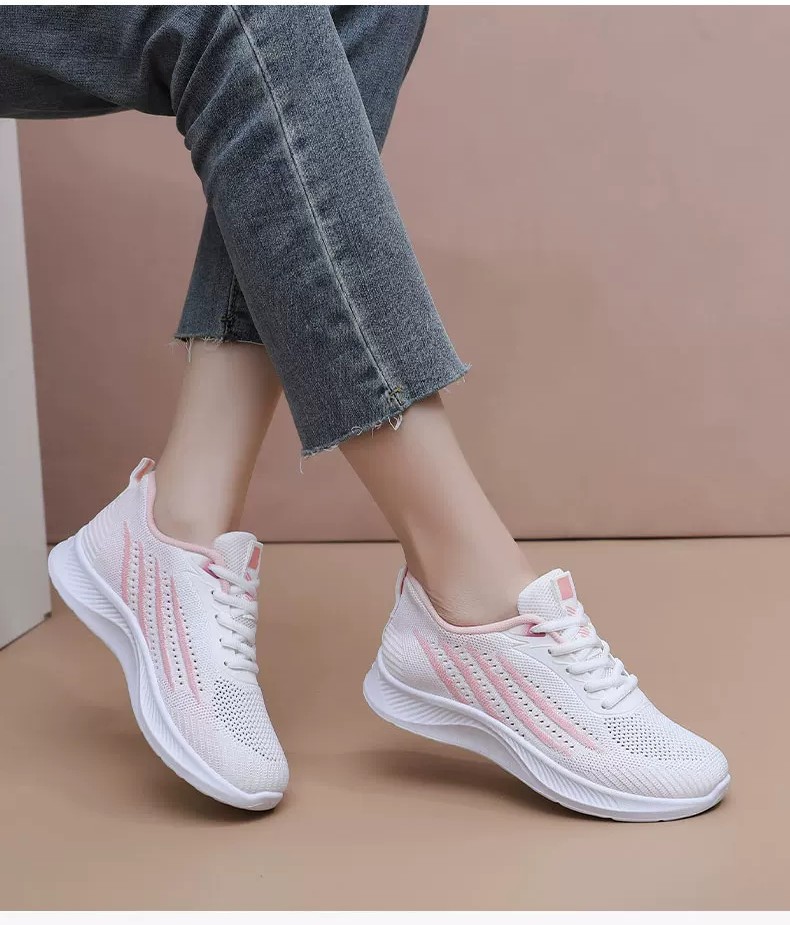
For a plain, no-frills starting point, these casual walking shoes in the everyday range have the flat-ish sole and roomy toe that work for neutral feet. They’re not corrective. That’s the honest description, and for most people it’s enough.
If your day is closer to 12,000 steps than 5,000, read the notes on walking shoes tested over 12 miles of cobblestone before you settle on a sole. Hard, uneven ground exposes the weaknesses that smooth pavement hides.
A quick word on socks, since they change the fit more than people expect. A thin cotton sock plus a cushioned walking shoe is a different fit from a thick wool one. Take the socks you actually wear to work with you, not the ones you wear at the weekend.
And if the ache is only in one spot, the inner edge just behind the ball of the foot, check whether your current shoes are worn unevenly there. A sole that’s worn down on one side is pushing your foot inward with every step, and no amount of arch support in the upper will compensate for a sole that’s already gone.
What support does not fix
Worth saying before you spend money on a shoe that promises more than it can deliver.
A supportive shoe won’t treat plantar fasciitis, and it won’t cure heel pain that’s worse in the morning. First-step pain when you get out of bed is a different problem from arch fatigue, and it usually needs stretching and time more than a new midsole. The clinical picture of plantar fasciitis is a useful read before you decide a shoe is the answer.
It also won’t fix knee pain that comes from the hip, or back pain that comes from sitting eleven hours a day. Shoes shift load by a few percent. That’s real, and a few percent is sometimes the difference between an ache and no ache, but it’s still a few percent.
And it won’t replace prescription orthotics if you already have them. If your podiatrist made you a device, buy shoes with a removable insole and enough depth to fit it. Take the orthotic with you when you shop, and pull the factory insole out in the shop to test the fit. Nobody will stop you.
One more honest limit: support costs weight. A shoe with a real shank and a firm heel counter usually lands at 300g to 400g per shoe. That’s fine for walking and annoying for travel. If you’re packing one pair for a 10-day trip, you’ll feel the difference at the airport, and your feet will feel it on the third day of sightseeing.
Also worth flagging: supportive shoes usually look supportive. A firm heel counter and a posted midsole add bulk to the silhouette, and the pairs that hide it best cost more. If you need the support for a job and want to wear the same shoes to dinner, budget for one of the sleeker models rather than expecting a work shoe to pass as a fashion pair.
Four checks that beat the label
In the shop, in this order, about five minutes:
- Press the inner midsole. Firmer there than on the outer edge means posting. Same firmness all round means neutral.
- Squeeze the heel counter. It should barely give. If it collapses, the shoe won’t hold your heel straight.
- Twist and bend. Twist like wringing a towel: some resistance. Bend at the toe: easy flex. Bend mid-arch: it should refuse.
- Try it with your own socks, at the end of the day. Feet are biggest at 6pm. A pair that fits at 10am will pinch by evening.
One extra thing, and it’s the one people skip. Walk on a hard surface for two minutes, not carpet. Carpet hides everything. Tile in the shop, or the pavement outside, tells you what the shoe will actually feel like for eight hours.
Sizing note, because it catches people out: walking shoes should leave about 10mm between your longest toe and the end, and that’s measured standing up with your weight on the foot. Sitting down, every shoe fits. Standing, half of them don’t. If your toes touch when you stand, go up half a size before you blame the arch support.
Pay attention to the return policy as well. Walk around the house for twenty minutes on the first evening, on tile rather than carpet, and keep the box. Most shops accept returns on unworn-outdoor pairs, and that twenty minutes catches more problems than a five-minute shop trial ever will.
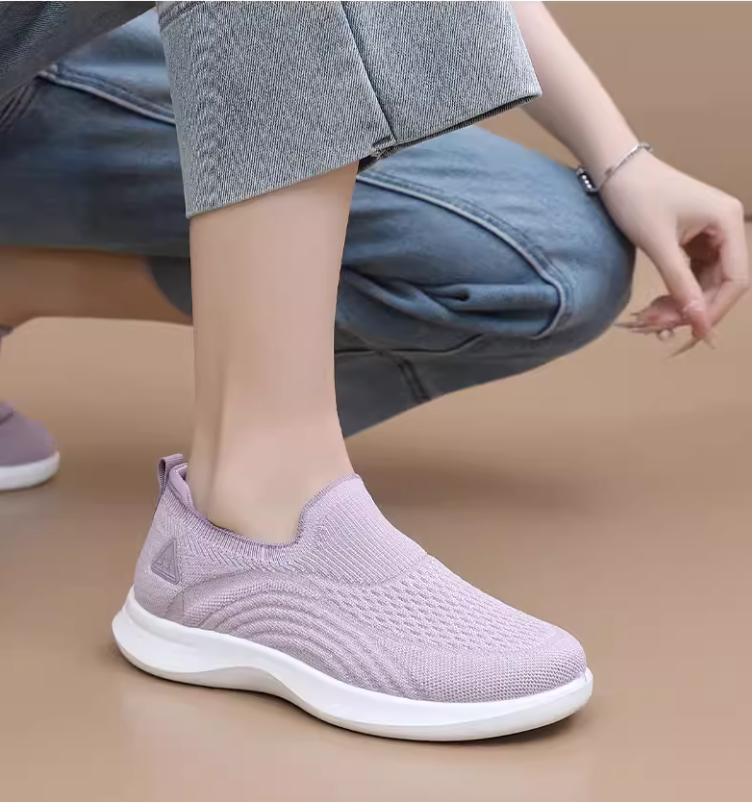
If you want a softer, more cushioned option for long days, soft-soled mesh sports shoes suit neutral feet and high arches better than flat feet. Add a 5mm insole and they cover a lot of ground for the money.
For fuller feet, the everyday sneaker shapes that leave room across the ball are worth a look. Fit does more for arch comfort than any single feature, and a wide toe box is the cheapest version of that. There’s a detailed write-up on what the size chart hides about wide toe boxes if you’re between sizes.
So do you need it, or do you need better fit?
Most people who think they need arch support actually need a shoe that doesn’t squeeze the ball of their foot. When the upper is too narrow, your foot rolls forward and inward to find space, and that reads as arch collapse. A half size wider fixes it for free.
If the wet print is neutral, the ache comes on after 8,000 steps, and your current shoes have a soft heel and a twisty sole, buy structure rather than a gadget. If the print is flat and your ankle rolls in on one leg, buy posting and a firm heel. If the print is a thin strip, buy cushioning and stop letting shops sell you rigidity.
And check the date on your current pair. Foam loses about half its rebound after 500 to 800 km of walking, which for a daily commuter is roughly eight months. Sometimes the arch support didn’t fail. The shoe just got old.
Last thing. Take the insole out of the pair you’re wearing now and look at it under the light. If the foam under your arch is crushed flat while the heel still looks new, that tells you the wear pattern better than any test in this piece. Your next pair should be bought against that pattern, not against a label.
And give any new pair two weeks before you judge it. Feet adapt, and the first three days in a shoe with more structure than you’re used to will feel worse than the twenty-first. If it’s still uncomfortable at the end of a fortnight, it’s the wrong shoe, and that’s a fair reason to return it while the window is open. Keep the receipt in the box and you’ll never have that argument.
None of this needs to be complicated. One test with wet feet, one press with your thumb, one walk on tile. That’s enough to tell a supportive shoe from a soft one wearing a supportive label.
