You get caught in a drizzle on a Tuesday. By the time you sit down at your desk there’s a water mark the size of a ten-pence coin on the toe of your boot, and you dab it with a tissue. That makes it worse.
Suede does that. It’s leather with the grain sanded open, which is why it feels like velvet and why it takes stains like a paper napkin. The useful part: most of the damage that kills a pair of women’s suede shoes happens in the first two weeks of wear, and nearly all of it is preventable with a brush and ten minutes.
Here’s what actually ruins suede, what doesn’t (despite what you’ve read), and the checks worth doing before you pay for a pair.
Suede is skin, so treat it like skin and not like fabric
Most people scrub suede the way they’d scrub canvas. That’s the first mistake, and it’s an expensive one. Suede is a split hide: the top layer of the grain is sanded to raise a short, soft nap. Water swells those fibres. Friction felts them. Heat shrinks them. Soap strips the oils that keep the hide supple.
Which means the three things you’d normally do to a dirty shoe are the three things that wreck this one. Don’t soak it. Don’t rub hard. Don’t put it near a radiator.
What works instead is boring and cheap. Brush dry. Let wet patches air-dry away from heat. Treat the nap before it mats down. If you want the technical version of what the material actually is, the Wikipedia entry on suede covers the tanning side, and the nubuck comparison explains why the sanded grain behaves the way it does. More useful than most care labels.
One number worth remembering: a proper suede brush has brass or stiff nylon bristles, and it costs less than a coffee. If your brush is soft enough to use on a cashmere jumper, it’s too soft to lift a matted nap.
The other thing worth knowing is that nap has a direction. Run your hand down the vamp and it feels smooth; run it up and it feels rougher and looks slightly lighter. Both are correct. The only problem is mixing directions on the same panel, because the light catches it differently and the shoe looks two-toned under a shop light.
Also, and this surprises people: water alone doesn’t ruin suede permanently. Water plus heat does. Water plus rubbing does. A pair that gets rained on, dried slowly at room temperature, and brushed the next morning usually comes back looking 90% of what it was.
The first 24 hours after rain decide the next two years
Say you’re wearing suede heels and the sky opens up on the walk from the car park. You have maybe a hundred metres to cover. What you do in the following day matters more than anything else you’ll do to those shoes.
First, get them off your feet and stuff them. Not newspaper with print, which can transfer ink onto damp lining. Plain paper towels or a rolled sock work fine. The point is to hold the shape while the hide dries, so the toe box doesn’t collapse into a crease that never comes out.
Next, air-dry at room temperature, away from radiators, hairdryers, and direct sun. A windowsill in November is fine. A radiator is not. Heat drives the moisture out too fast and leaves the leather stiff and slightly smaller. That’s how a pair ends up half a size tight in the toe and never recovers.
Then wait. Twenty-four hours minimum, longer if the lining is soaked. Brush the nap up with the brass side of the brush, in one direction, light pressure.
- Do: stuff with paper, dry flat and slow, brush once dry
- Don’t: rub the wet patch, use a hairdryer, put them on a radiator
- Don’t: wear them again the next morning “just to nip out”
If a water mark has already dried into a tide line, you can often lift it by dampening the whole panel evenly with a clean cloth and letting it dry again. Even wetting beats a patch, because a patch is just a visible edge where the water stopped.
How long you wait depends on the lining. A thin unlined suede flat is dry in a few hours. A suede boot with a padded collar and a synthetic lining can hold moisture for two days, and that’s the pair that ends up smelling of damp wardrobe. Push your fingers into the toe the next morning. Cool and clammy means another day off your feet.
This is the part where I’d push back on the common advice to “just waterproof them and stop worrying”. Sprays help, and I’ll get to which ones. They don’t replace drying properly. A treated pair that’s left wet in a bag overnight still ends up with a smell and a limp toe box.
What to keep by the door, and what you can skip
You don’t need a shelf of products. Four items cover almost everything, and the total is under £25 if you buy plain versions instead of the branded kits.
The workhorse is a brass-bristle brush. It lifts the nap, removes dry dirt, and revives the surface after a rain episode. Use short strokes, always the same direction, never circles.
For scuffs, a suede eraser. Looks like a pencil eraser, costs about £3, and handles marks on the heel counter better than anything wet. Rub gently, brush off the crumbs.
Then comes a protector spray. Look for a fluorocarbon-free formula, because the older chemistry is being phased out across the EU for environmental reasons and OEKO-TEX publishes guidance on restricted substances in leather finishing. Two light coats, twenty minutes apart, outside, on a dry day. Reapply every six to eight wears if you wear them hard.
Last, a soft rubber brush or an old toothbrush. For the welt and the sole edge, where mud collects and nobody looks until it’s dried solid.
What you can skip: foam cleaners marketed for suede, which usually need water and agitation and are easy to over-apply. Also skip the “suede shampoo” bottles. If a stain needs more than an eraser and a brush, a specialist cleaner is worth paying for once, not a cheap bottle you’ll use twice.
Store them with a shoe tree or stuffed with paper, in a cotton bag, not a plastic box. Suede needs to breathe. A sealed plastic tub in a warm wardrobe is a mould incubator.
If you only buy one thing, buy the brush. The spray protects against the accident you can’t control. The brush repairs the wear you cause every time you walk, because dust works into the nap and grinds it flat at the heel and the toe. Thirty seconds after each wear is the difference between a pair that looks two years old after three winters and one that looks five.
Salt is the January problem nobody warns you about
Gritted pavements are harder on suede than rain. Road salt dries into a white bloom along the welt and the lower panel, and if you leave it there for a week it pulls moisture out of the hide and leaves a stiff, chalky crust.
You’ll see it first on the toe and the outside edge of the heel. That’s where the spray from passing traffic lands. If you commute through a city in winter, assume it’s happening and deal with it weekly rather than in March.
The fix is a diluted vinegar wipe. One part white vinegar to one part water, on a cloth, wrung out so it’s barely damp. Blot the salt line, don’t scrub. Then let it dry and brush. Vinegar neutralises the salt; water alone just moves it around.
For heavy build-up on a nubuck or suede boot, a suede stone (a coarse rubber block) takes the crust off without wetting the panel. Work in short strokes, and don’t press hard enough to burnish the surface shiny.
A word on colour here, because it changes the whole calculation. Black suede hides salt better than any other shade, which is why black suede boots survive northern winters and pale taupe ones don’t. If you want one pair to get you through slush, buy black. If you want the pair that looks best in October light, buy taupe and accept that it’s a fair-weather shoe.
The same logic applies to the sole edge. A raw leather welt takes salt and shows it as a white line. A black rubber sole edge wipes clean with a thumb. That’s a two-second check at the till, and it saves you a fortnight of vinegar wipes in February.
Colour changes the maintenance math more than price does
Two pairs at the same price can have wildly different lives depending on shade. Suede is a dye-heavy material, and pale dyes sit closer to the surface. That’s why a cream pair shows a coffee splash and a chocolate pair doesn’t.
Rough ranking, based on how forgiving each shade is in real use:
- Black, dark brown, navy: hide salt lines and scuffs, take repeated brushing well, age into a slightly polished look
- Chocolate, rust, olive: forgiving of water marks, less forgiving of oil
- Taupe, sand, grey: show every tide line, need spray from day one
- White, pale pink, mint: one season of careful wear, then a visible patina whether you like it or not
There’s a myth that darker suede can’t be cleaned because you’ll lighten it. Not true. Dark suede cleans the same way; it just hides the evidence better between cleans. What you can’t do is recolour a patch on pale suede without it showing, which is why pale pairs are the ones that end up at the back of the wardrobe.
If you’re buying your first pair of women’s suede shoes and you want them to last, pick a mid-dark neutral. Not because it’s more “classic” (I don’t care about that argument), but because you’ll clean them less often, and less cleaning means less wear on the nap.
One caveat on very dark suede: it can crock onto pale tights and socks for the first few wears. Wear dark socks the first three times, or you’ll be explaining a grey smudge on your ankle at 9am.
Pale suede has the opposite problem. It picks up dye from dark denim, and the transfer sits in the nap rather than on top of it. If you wear raw jeans, expect a blue haze along the heel counter by week three. An eraser takes some of it off. Nothing takes all of it off. Buy pale suede for skirts and dresses, and keep your indigo away from it.
Suede, wide feet, and the half-size trap
Suede has almost no stretch. That single fact decides how you should size, and it’s where most returns come from. Leather loosens. Canvas gives. Suede keeps the shape it was cut in, so if the pair pinches across the ball of your foot in the shop, it will still pinch in six weeks.
Here’s the rule I’d give anyone with a wide forefoot: size for the widest part, not the length. If the length feels perfect but the sides press on your little toe, going up half a size is usually better than hoping it relaxes. You’ll get length you don’t need and width you do.
Narrow feet have the mirror problem. Suede won’t hug the arch the way soft calf will, so a pair that fits fine standing can slip at the heel after twenty minutes of walking. A heel grip helps. A shoe that’s simply too wide for you doesn’t.
- High instep: check the lace or strap length, because suede won’t stretch over the bridge of your foot
- Wide ball: size to the ball, add a thin insole if the length then feels loose
- Narrow heel: expect slip in a rounded counter, look for a higher, firmer one
- Bunions: avoid pointed toes in suede entirely; the material has no give where you need it
Half sizes are where the chart lies, and it’s worse in a material that won’t give. If your measurements land between two sizes, the half size your size chart won’t tell you walks through the same decision for closed-toe pairs.
Try them with the socks or tights you’ll actually wear. Sounds obvious. Still the most common reason a pair gets returned after one outing, because suede doesn’t forgive a 2mm difference the way a knit upper does.
If you’re between sizes and the shoe has a covered platform, take the smaller size. The platform reduces how much your foot slides forward, so the extra length is dead space rather than comfort.
Where cheap suede gives itself away, in the hand
You can judge a suede shoe in about fifteen seconds without knowing anything about construction. Three checks, all of them tactile.
Brush the nap with your thumb. Good suede lifts and falls back. Cheap suede either feels flat like felt or leaves a permanent lighter streak where you pushed. If it streaks, the hide is thin and the finish is sprayed on.
Bend the shoe at the ball. It should crease once, cleanly, and spring back. If it creases in three places like a paper bag, the sole is stiff and the upper is thin, and you’ll get a permanent fold across the toe within a month.
Look at the cut edge near the sole. Real suede has a fibrous edge. Bonded or “sueded microfibre” has a smooth, almost plastic rim, and it will peel at the welt after a winter of wet pavements. That’s not a snob thing; it’s a repairability thing. A cobbler can resole a leather upper. They can’t do much with a peeling synthetic rim.
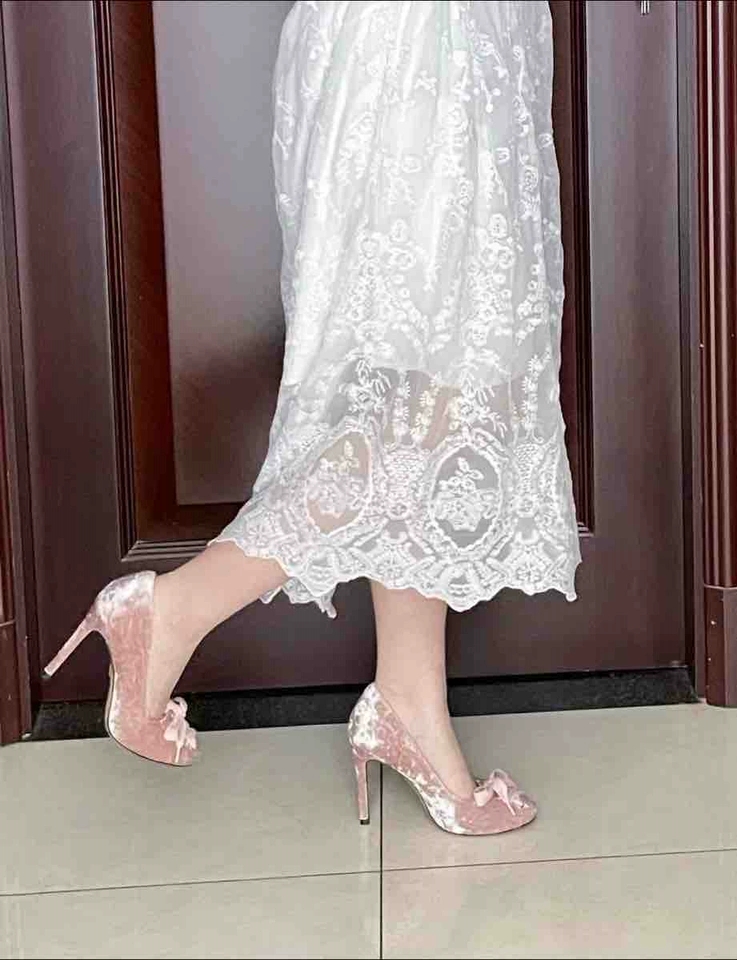
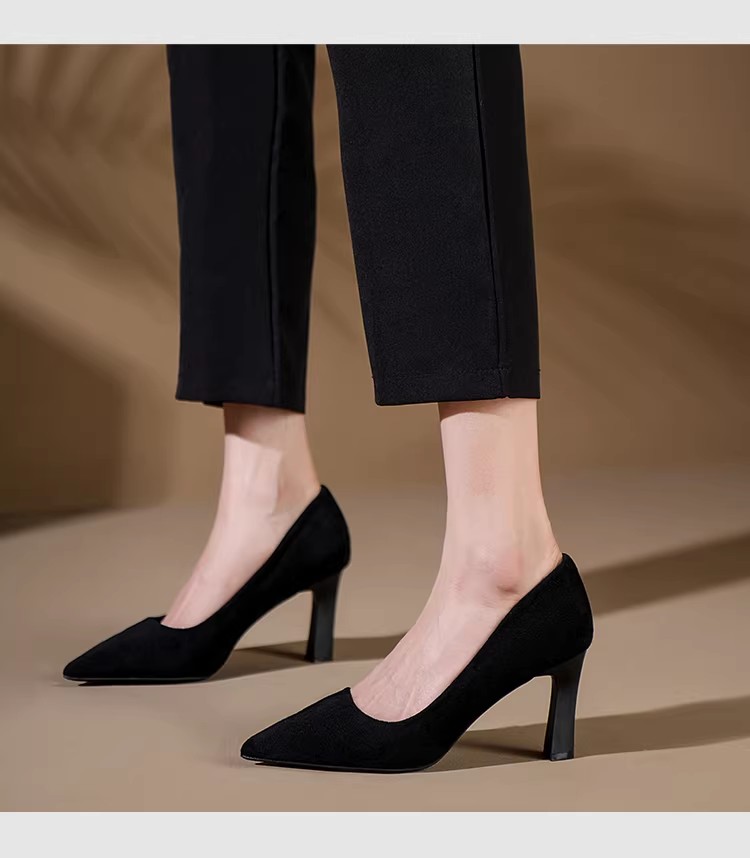
For a sense of what decent construction looks like at a mid price, this retro suede single shoe with a covered platform shows the shape I mean: nap that runs one way across the whole vamp, a covered platform that keeps the toe off the ground, and a heel that isn’t trying to be a stiletto. The black suede commuter heel with a soft sole is the other end of the same idea, built for standing rather than for photographs.
Where suede fails most often isn’t the upper. It’s the lining. A cheap synthetic lining doesn’t breathe, so the inside stays damp after a long day, and damp plus warmth plus darkness is how you get a smell you can’t brush out. If you can only check one thing in the shop, push your hand inside and feel whether the lining is leather or a smooth plastic sheet.
A five-minute check before you pay
Run these in order. Any single failure is a reason to put the shoe down, not a reason to negotiate.
- Heel counter pressure. Squeeze the back of the heel. It should resist slightly and spring back. If it folds flat, you’ll walk out of the shoe within a month, and no insole fixes that.
- Toe room at 4pm. Try shoes late in the day, because your feet swell up to half a size by evening. You want a thumb’s width at the toe, measured standing.
- Nap direction. Run your hand up and down the vamp. If the colour shifts dramatically one way and looks patchy the other, the dye is uneven and it’ll look worse after a season of brushing.
- Sole flex point. It should bend where your foot bends, roughly a third of the way back from the toe. A sole that bends in the middle will fight your arch all day.
- Stitch density at the welt. Even, tight stitching holds. Wide, gappy stitches are where water gets in first.
Two practical notes to close on. First, buy the protector spray at the same time as the shoes, not three weeks later. The first two wears are when most of the damage happens, and a treated pair beads water instead of absorbing it.
Second, if you’ve already got a pair with a dried water mark and you’re wondering whether it’s salvageable, the answer is usually yes, and the method is the boring one: dampen the whole panel, dry it slowly, brush it up. If you’d rather avoid the whole problem, look at how much simpler a non-suede option is. The three heel buys people regret, and the two measurements that would have stopped them covers the buying side in more detail, including the width measurement almost nobody takes.
And if suede still appeals, which it should, because nothing else looks quite like it in low autumn light, then treat the first fortnight as the test. Brush them after every wear. Keep them out of the rain for the first few outings. After that, they’re just shoes, and you’ll stop thinking about them. Browse the rest of the women’s shoe range if you want to compare shapes before you commit to a shade.